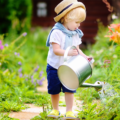
It was a rainy day. The sky was pouring its heart out. My little boy went out and started playing in the rain. We were splashing water, dancing, and making paper boats. Then he asked me curiously, “Mumma, how does rain take place? Most of the time we have sun, and today it’s raining. How? He was confused.
Contents
I thought for a bit about this. I know from my school days that it is the natural water cycle that is involved. But how should I explain it to my child? We have all learned through our textbooks about the natural water cycle, but he got confused when I tried to explain it verbally. He was a little irritated and said, “I am not getting it.”
I thought to look up “how to explain the water cycle to children” when I came across the idea of creating a small water cycle in a bag.
I told him we would create a little experiment to learn how rain works. He asked me innocently, “Is it going to rain inside our home?” I smiled and told him that we would do a smaller version of rain. It would answer his questions on where water comes from and where it goes. Here is how to create a water cycle in a bag!
What You Will Need
Honestly, this is an easy-to-go basic science experiment. All you need is:
- A clear plastic ziplock back.
- A black sketch pen to draw clouds and waves on the bag.
- ¼ cup of water.
- You can use a little blue paint in the water for effect and to better understand the process.
- Lastly, a piece of tape to stick the plastic bag to the window.
Let’s Begin
The very first thing I asked my son to start with was drawing clouds on the upper side of the bag. He understood that clouds had something to do with water. He smiled a bit and then continued.
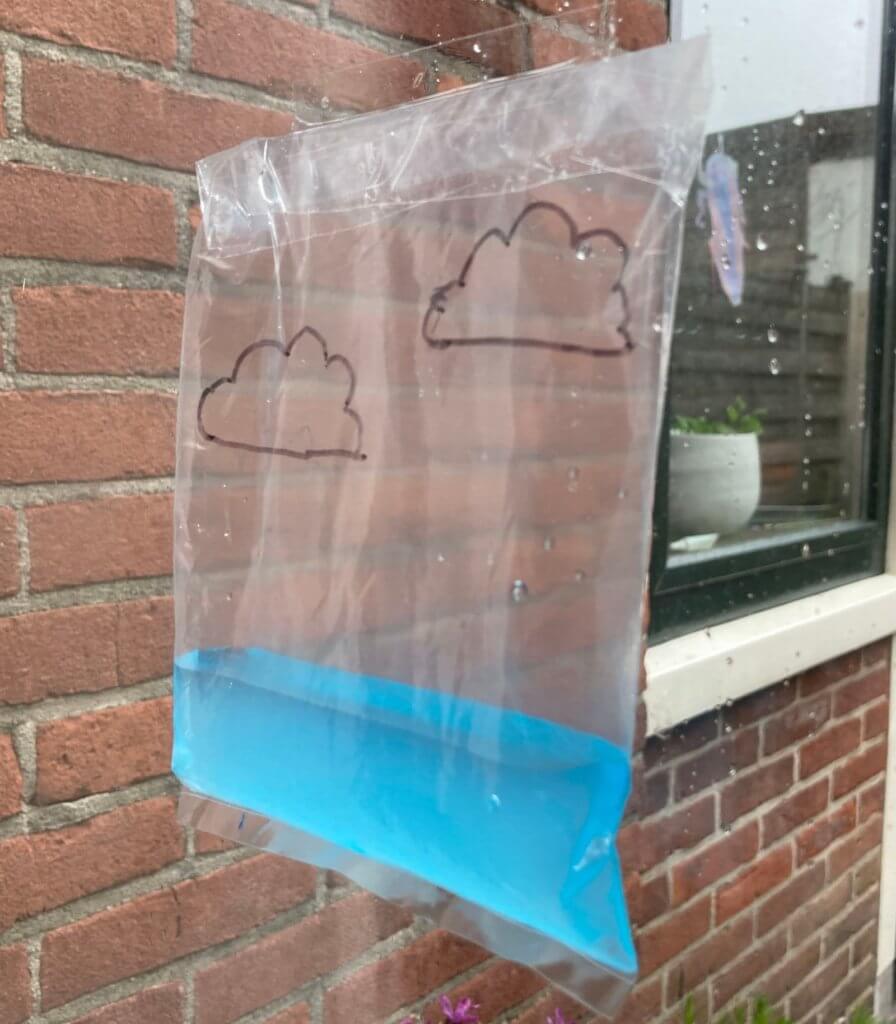
While it’s not important to draw these clouds, it is easier to explain the process to children while also improving their fine motor skills.
Next, I asked him to pour ¼ cup of water and add a bit of blue paint to it. “Oh! It looks very pretty,” he exclaimed. I gave him a nod to continue. He then poured the water into the bag.
Now, we needed to find a window to hang the water bag. We have a big north side facing window in our living room. I tapped the bag on that window. We both started waiting for the magic to begin.
Before I move on to what happened, let me first explain the water cycle.
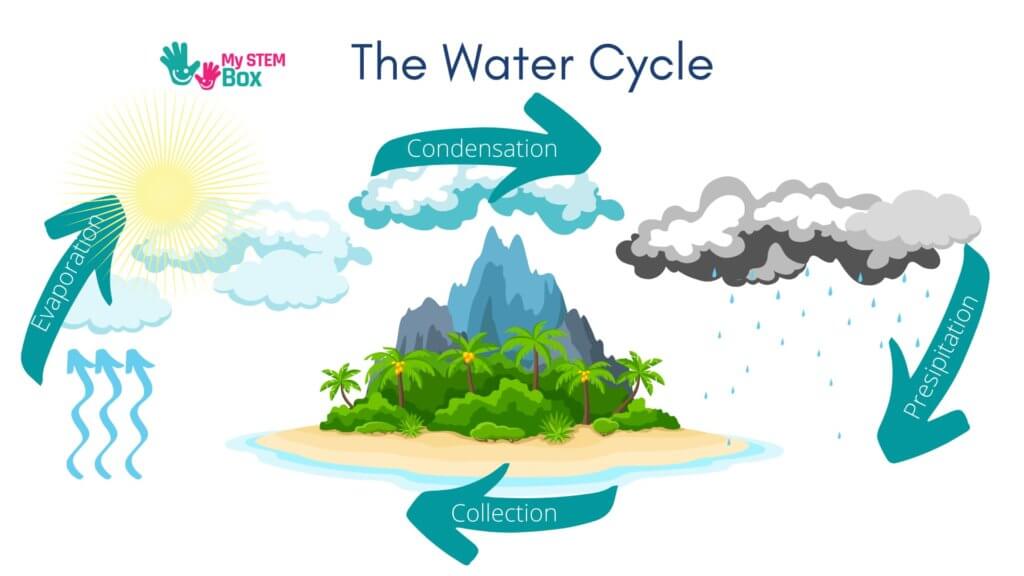
What is The Water Cycle?
As we all know, the sun’s heat causes water to turn into water vapor from natural resources, including lakes, rivers, streams, and oceans. This process is known as evaporation.
Another surprising way in which nature makes water vapor is when plants and the soil release water into the atmosphere. Plants have these small pores, which are known as stomata. Water gets released from these stomata when sunlight falls on them. This process is known as transpiration.
Related article: How Do Plants Breath?
The air near the surface is hotter than that in the higher region of our atmosphere. This heat causes air to rise, and it takes the water vapor with it. This process is known as convection.
As water vapor reaches higher altitudes and comes in contact with cool air, it cools down to make clouds. This is known as condensation.
Slowly, these clouds fill with water and get saturated. The saturation causes clouds to become dense, and they reach a point where the water starts falling from the cloud to the earth in the form of rain. This process is also called precipitation.
Rain fills up our streams, lakes, and other water resources with water, and hence the water cycle continues.
Back To Our Water Cycle In A Bag
A similar process is happening in our bag. In the next few days, we saw the water was warmed up by the sunlight, and vapors were visible in the upper region where we had drawn clouds.
I explained to him that the blue water beneath is like a river. The water from the river condensed upwards to form clouds. My son exclaimed: “Oh, this is how clouds are created!”. He understood immediately that water from rivers makes clouds. The blue color lent a beautiful effect to the whole experiment.
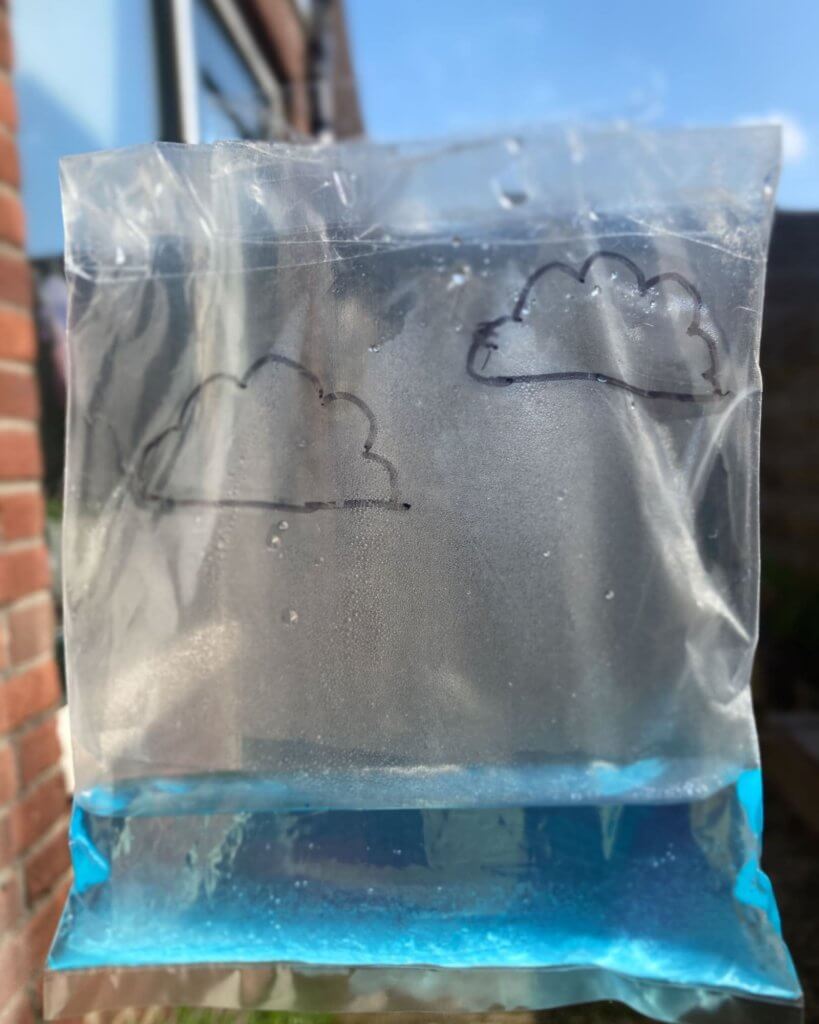
In the coming days, these little clouds were saturated and could not hold any water due to precipitation in the form of droplets. My son came up to me very excitedly, “Mumma, see there is rain in our bag.” We could see a few droplets. Then, I told him to see how the water is again going back to our river.
He was delighted but wanted to make sure. He asked me not to remove the water bag and watched the process again in the coming days. I felt pleased that my little one understood the water cycle, not by cramming from a textbook but by understanding it practically. I know that whatever may come, my child will never forget the functioning of a water cycle.
The Learning Process
Let us stress and work on making concepts more practical than theoretical. Reading and imagining are different while watching a process unfold in front of their eyes is an altogether different experience for a young child.
It’s important to conduct these small experiments that help your child understand scientific concepts rather than cramming them from a book without ever having seen it themselves. Experimentation is the only way we can build a scientific temper in them. Do share your own experiences with us of how you showed the water cycle to your children!
As a parent of a five-year-old inquisitive boy, I have gained a lot of experience finding fun activities and toys to help him understand science and understanding our world in general. On this blog, you’ll find an extensive amount of tutorials, guides, and toys about Science, Technology, Engineering, and Math based on my personal experience to help your child develop critical STEM skills.