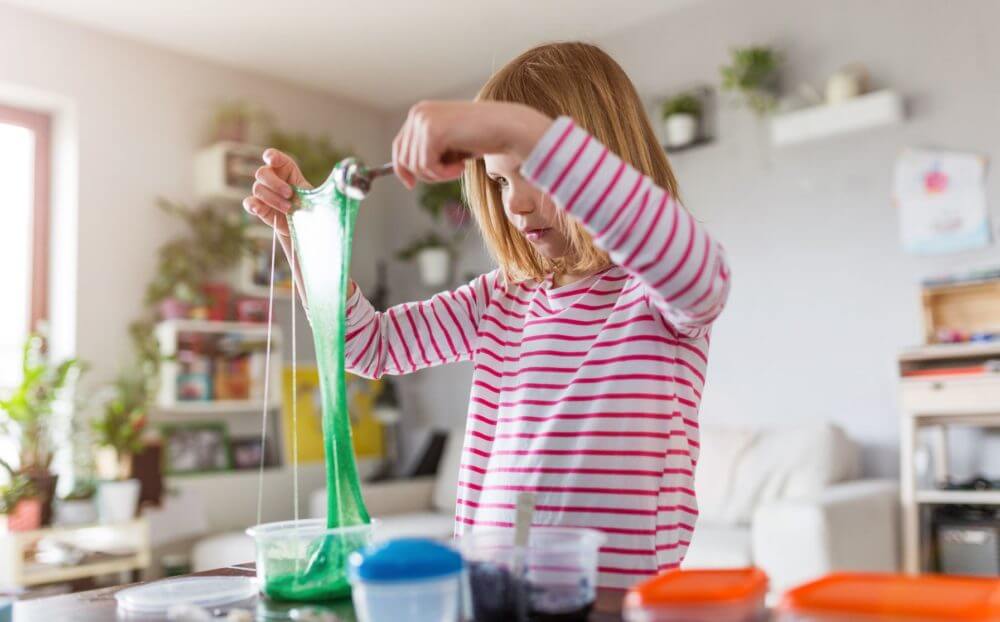
If you’ve got kids, you’ll have noticed that the “slime” craze has taken the world by storm, providing hours of fun for a very low cost - particularly if you’re making it yourself.
Contents
If your kid loves all things space-related, they’ll love this galaxy-themed slime. Unlike normal slime, it combines multiple colors, as well as glitter, to create a mesmerizing slime reminiscent of the night sky and galaxies.
While it looks complicated, it’s pretty easy once you know how, and to help you out, we’ve put together a complete how-to guide for making the best galaxy slime.
There are multiple methods out there, but in our opinion, this is the easiest, and most effective way, to achieve perfect galaxy slime.
Keen to find out more? Keep reading!
What you’ll need:
- 5 oz bottle Elmer's Clear School Glue.
- 1 tablespoon baking soda.
- 2 teaspoons saline contact solution (needs to have some kind of boric acid).
- Food coloring (we recommend blue, black, and purple).
- Superfine glitter in various colors.
- Bowl for mixing.
- Measuring spoons.
- Spoon for mixing.
- Small airtight container for storing.
Method
Step 1: Mix the glue and baking soda
Empty the entire bottle of glue into a large bowl and then add one tablespoon of baking soda, then stir together until completely mixed.
Step 2: Add your color
You now need to add your food coloring. Any colors that mimic the night sky will work well, but purple and black are best.
You’ll want to add plenty of food coloring so that the mixture is completely saturated, as the colors will fade slightly when you knead the slime.
Step 3: Sprinkle in your glitter
Now it’s time to sprinkle in your glitter to achieve that night sky look.
You can add as much or as little as you wish, and the color is completely up to you, although green, purple, gold, and white work well as these show up against dark colors.
Don’t go too overboard- about a teaspoon of glitter works well and will keep your slime feeling smooth rather than gritty.
Step 4: Add the saline
This step is vital for giving your slime that elastic feel that kids love, and this is where the saline solution comes in.
Add one teaspoon of saline solution to your slime and mix well.
You’ll gradually see the slime form as you mix it, and once mixed, you can add the second teaspoon of contact solution and mix again until your slime comes together in a clump and easily peels away from the sides of the bowl.
Step 5: Knead away
To get rid of that sticky, wet texture, you’ll need to knead the slime.
Do this by working the slime between your hands and kneading it like dough on a clean surface for a couple of minutes.
You’ll notice it will become softer and more malleable the more you knead it.
Step 6: Clean up time
Once you’re happy with the consistency of your slime, it’s time to clean up.
You can get rid of any slime residue on your bowl or surface by simply pressing the blob of slime against any remaining pieces, and they should peel away with ease.
Then clean up your utensils and you’re good to go!
Enhancing your galaxy slime
There are many different ways to achieve galaxy slime, but one method that works well is to make multiple colors of galaxy slime (2-3) and then twist the different strips of slime together so that the colors ooze together.
This can create an even deeper “space” effect and the multiple colors really help achieve a galactic look.
Storing your slime
You can prolong your slime by storing it in an airtight container or a ziplock bag, which should keep it fresh for about 2-3 weeks when stored at room temperature.
You can also keep it refrigerated to prevent bacteria growth, which should extend its shelf life, too. Just be sure to clearly label it so nobody mistakes it for food!
The more the slime is played with, the quicker it will turn bad.
However, you can bring back its elasticity by kneading the slime again for a few minutes, which also works if you experience any of the liquid seeping out.
Other methods
- You can also use glitter glue rather than food coloring and glitter. To do this, you’d simply replace your regular glue with the glitter version, and omit the food coloring and glitter steps.
- Liquid starch can also be used to transform glue into slime instead of using a saline solution.
- Borax, which you can find in the laundry aisle of the supermarket, is a traditional ingredient used to make slime, however, some people have safety concerns about this ingredient, which we'll go through below.
Safety considerations
Homemade slime is fun and accessible for everyone. However, some parents have refrained from using Borax in their slime recipes as doctors have warned it can be toxic if not diluted properly, which could be the reason why an 11-year-old girl found her hands covered in third-degree burns after making slime.
There are plenty of non-toxic recipes for making slime, including edible slime so you needn’t worry about your toddler or baby putting some in their mouth.
However, it’s always a good idea to refrain from giving slime to young children and babies, unless it’s completely non-toxic and edible, and you should always supervise them regardless. For older children, slime is a perfectly safe way to allow them to explore their senses.
Summary
Galaxy slime is one of the most fun and interesting slimes to make, and it’s sure to get your children inspired by space if they aren’t already!
We love this slime as it’s versatile and can be made in a range of different color combinations - the options are as endless as outer space itself…
To ensure you get the most out of your slime, always store it in an air-tight container and ensure the slime is suitable for the age group you’re catering to.
We recommend avoiding borax and using the saline solution recipe, as outlined above, and if you’re making slime for toddlers and babies, it’s safest to follow an edible recipe instead.
Happy sliming!
As a parent of a five-year-old inquisitive boy, I have gained a lot of experience finding fun activities and toys to help him understand science and understanding our world in general. On this blog, you’ll find an extensive amount of tutorials, guides, and toys about Science, Technology, Engineering, and Math based on my personal experience to help your child develop critical STEM skills.